Fabricating Jewelry Settings With Wirework and Metal Clay
In my last blog, Jewelry Findings from Tripps and Rio Grande Arrived Today! I purchased a variety of settings from Tripps.com and Riogrande.com. None of the settings were a perfect fit for my native cut gemstones. I began to research ways to create settings for rings and I found two methods that did not require years of jewelry training: wirework settings and metal clay settings.

I tried the Classic Prong Ring design using 22 gauge square Argentium wire and 20 gauge half round Argentium wire, both half-hard. Argentium silver is a silver alloy that contains Germanium, an element that slows the development of tarnish. This design is for large stones 8mm x 10mm or larger. The stone I am trying to set is the dark green tourmaline that I purchased for my sister. You can read about the stone in my blog entry, Gemology Instruments. The stone measures 10.2mm x 6.5mm x 4.7mm.


As you can see, this stone is slightly too small for this ring setting design. I also found the setting too flexible even if I did adjust the setting to accommodate the smaller stone. I'm afraid that this setting is not sturdy enough, and the tourmaline will loosen and fall out with wear.

I put aside the half-finished ring and pulled out the other wirework setting I purchased online, the Solitaire Faceted Ring. This ring design is for smaller round stones and recommends thinner 22 gauge square wire.
Because my gemstone is rectangular, I changed the design by increasing the size of the prongs and increasing the distance between the prongs.
While I was working the wire in this design, the wires soon became too stiff and brittle to continue working. To soften the wires, I decided to anneal them, by firing with a blowtorch until the wires glow a dull orange. After firing, the silver is covered with an oxidized dark coating, which can be removed with warm pickle (vinegar warmed in a small slow-cooker).
While wrapping the ring, the shank changed from a size 5 to a size 7, which was incredibly disappointing. To reduce the size of the ring, I cut the shank in the middle and shortened either side. Then I wrapped the ends with 20 gauge half round wire to widen the ring shank and add weight to the ring.
When I tried to set the tourmaline, the prongs were too short to fit around the stone and were in the wrong position. Even after the adjustments, this ring design is really meant for a round setting for a small stone. Determined to finish the ring, I found a small oval pink spinel in my collection that fit the setting. Using a bezel roller, and carefully bent the wires over the stone.

I was really disappointed that neither wirework setting design would fit the tourmaline. In a previous blog post, Jewelry Findings from Tripps and Rio Grande Arrived Today!, the manufactured settings I purchased were too large and too heavy for the stone. Tourmalines are a delicate stone that can easily shatter during the setting process if the metal is too difficult to push around the stone.
I went to the library to research about jewelry setting methods and found a few books about a new material called metal clay. It's a clay manufactured in Japan that consists of superfine powdered metal combined with an organic binder. Once dried, it is heated so that the binder is burned away and only metal is left. It can be shaped and textured like real clay so the possibilities are very exciting.

Metal clay can be used to set stones, especially stones that are irregular in shape. The limitation is that there are only a few stones that can survive the firing process, such as rubies, sapphires, and CZ's. Tourmalines will not survive the firing process, so I found a method that would use jeweler's investment, a fire-proof material, in place of the gemstone.

Jewelers investment is essentially a finely milled plaster of Paris. I poured two tablespoons of water in a small plastic container and added investment until the mixture was the consistency of yogurt.


Since Arentium silver has a much lower melting point than fine silver, the metal clay setting must be fired at a less than ideal temperature. Metal clay will sinter at lower temperatures, but it will not be as strong, and it will not solder well to the Argentium silver shank. In order to have a strong bond between the shank and the metal clay setting, the connection between the two different materials must be mechanical. To achieve this, I need an armature to anchor the metal clay setting to the ring. My first thought was using a fine wire jump ring, but it was too thin and delicate to work with.

I decided to use a ready-made thick 14 gage jump ring from Rio Grande.


Wirework Settings
I Googled "wirework settings" and found two settings that could work with my stones, the Classic Prong Ring from jewelrylessons.com and the Solitaire Faceted Ring, from wire-jewelry-lessons.com.
Classic Prong Setting


Dark Green Tourmaline

Classic Prong Ring Setting using 22 gauge square wire

Here is the setting on my finger

The setting with the prongs bent

Inserting the tourmaline for size
As you can see, this stone is slightly too small for this ring setting design. I also found the setting too flexible even if I did adjust the setting to accommodate the smaller stone. I'm afraid that this setting is not sturdy enough, and the tourmaline will loosen and fall out with wear.
The Solitaire Faceted Ring

I put aside the half-finished ring and pulled out the other wirework setting I purchased online, the Solitaire Faceted Ring. This ring design is for smaller round stones and recommends thinner 22 gauge square wire.
Because my gemstone is rectangular, I changed the design by increasing the size of the prongs and increasing the distance between the prongs.
Annealing
While I was working the wire in this design, the wires soon became too stiff and brittle to continue working. To soften the wires, I decided to anneal them, by firing with a blowtorch until the wires glow a dull orange. After firing, the silver is covered with an oxidized dark coating, which can be removed with warm pickle (vinegar warmed in a small slow-cooker).
While wrapping the ring, the shank changed from a size 5 to a size 7, which was incredibly disappointing. To reduce the size of the ring, I cut the shank in the middle and shortened either side. Then I wrapped the ends with 20 gauge half round wire to widen the ring shank and add weight to the ring.
When I tried to set the tourmaline, the prongs were too short to fit around the stone and were in the wrong position. Even after the adjustments, this ring design is really meant for a round setting for a small stone. Determined to finish the ring, I found a small oval pink spinel in my collection that fit the setting. Using a bezel roller, and carefully bent the wires over the stone.

Argentium wirework ring using Solitaire Faceted Ring design.
As you can see, the silver is still dark and gray with oxidation from the annealing process. Although the ring fits my finger well and is adjustable, I'm not happy with this setting as it covers too much of the stone.
Metal Clay Settings
I was really disappointed that neither wirework setting design would fit the tourmaline. In a previous blog post, Jewelry Findings from Tripps and Rio Grande Arrived Today!, the manufactured settings I purchased were too large and too heavy for the stone. Tourmalines are a delicate stone that can easily shatter during the setting process if the metal is too difficult to push around the stone.
I went to the library to research about jewelry setting methods and found a few books about a new material called metal clay. It's a clay manufactured in Japan that consists of superfine powdered metal combined with an organic binder. Once dried, it is heated so that the binder is burned away and only metal is left. It can be shaped and textured like real clay so the possibilities are very exciting.
Metal Clay comes in a variety of metals
Photo from metalclaysupply.com
Setting Stones in Metal Clay - Step 1 Making Investment Plugs
Metal clay can be used to set stones, especially stones that are irregular in shape. The limitation is that there are only a few stones that can survive the firing process, such as rubies, sapphires, and CZ's. Tourmalines will not survive the firing process, so I found a method that would use jeweler's investment, a fire-proof material, in place of the gemstone.
Using Jewelers Investment

Jewelers Investment
Jewelers investment is essentially a finely milled plaster of Paris. I poured two tablespoons of water in a small plastic container and added investment until the mixture was the consistency of yogurt.


I took some polymer clay and shaped it into a thick rectangle that was large enough to house the tourmaline and a half karat sapphire.

I slowly pushed the stones into the polymer clay so that their tables (top surface) were flush with the surface of the polymer clay.

Using a sharp pick, I gently pried out the stones from the polymer clay. I used smoothing tool to heal any dents or scratches that were caused with the stone removal.

I poured the jeweler's investment into the polymer clay mold. Once the investment set in couple of hours, I popped them out and let dry for a few days. The investment plugs must be 100% dry before firing or they will explode and destroy your setting. You can tell if they are dry if they are no longer cool to touch.
I used the extra investment to make ring size plugs that I can use in the future when I make metal clay rings. These plugs ensure that the ring shrinks down to the proper size ring shank.

Ring size plug mold, from metalclaysupply.com


Investment plugs - ring plugs size 4 and 5, and gemstone plugs for the tourmaline and sapphire
Creating the Ring Shank
Last year I hammered out an Argentium silver ring shank for the tourmaline ring. I could make a metal clay ring shank, but the PMC3 clay I purchased is made of fine silver (99% silver) and is not as strong as Argentium silver, which is a strong silver alloy. PMC3 is also really expensive at over 2$ a gram.
Argentium ring shank 6mm wide, darkened by oxidation from annealing
Since Arentium silver has a much lower melting point than fine silver, the metal clay setting must be fired at a less than ideal temperature. Metal clay will sinter at lower temperatures, but it will not be as strong, and it will not solder well to the Argentium silver shank. In order to have a strong bond between the shank and the metal clay setting, the connection between the two different materials must be mechanical. To achieve this, I need an armature to anchor the metal clay setting to the ring. My first thought was using a fine wire jump ring, but it was too thin and delicate to work with.

Fine silver jump ring does not sit well in the ring shank
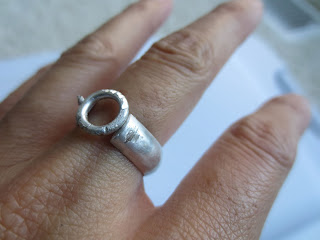
I decided to use a ready-made thick 14 gage jump ring from Rio Grande.


It sits easily on top of the ring with lots of surface area touching the ring shank

Easy Argentium silver solder paste
I smeared some Argentium easy solder paste on the jump ring and ring shank and soldered them together. After soldering, I placed the ring in warm pickle and then used a file to roughen the ring where the metal clay would touch. By doing so, the metal clay will have a better grip on the ring shank.

Soldering the jump ring and ring shank

Ring shank and jump ring soldered together